Table of Contents
How to access files on a non-working PC
In a scenario where the PC will not boot or cannot be accessed, it may be necessary to still retrieve some files off of its hard drive (for instance, myCNC profile folders that contain all the custom settings for the myCNC software).
In that case, follow the steps below:
Step 1: Using Ubuntu MATE through LiveUSB
- Connect the power cable, the screen through an HDMI or VGA cable, keyboard, mouse and the LiveUSB with Ubuntu Mate 20.04 to the computer
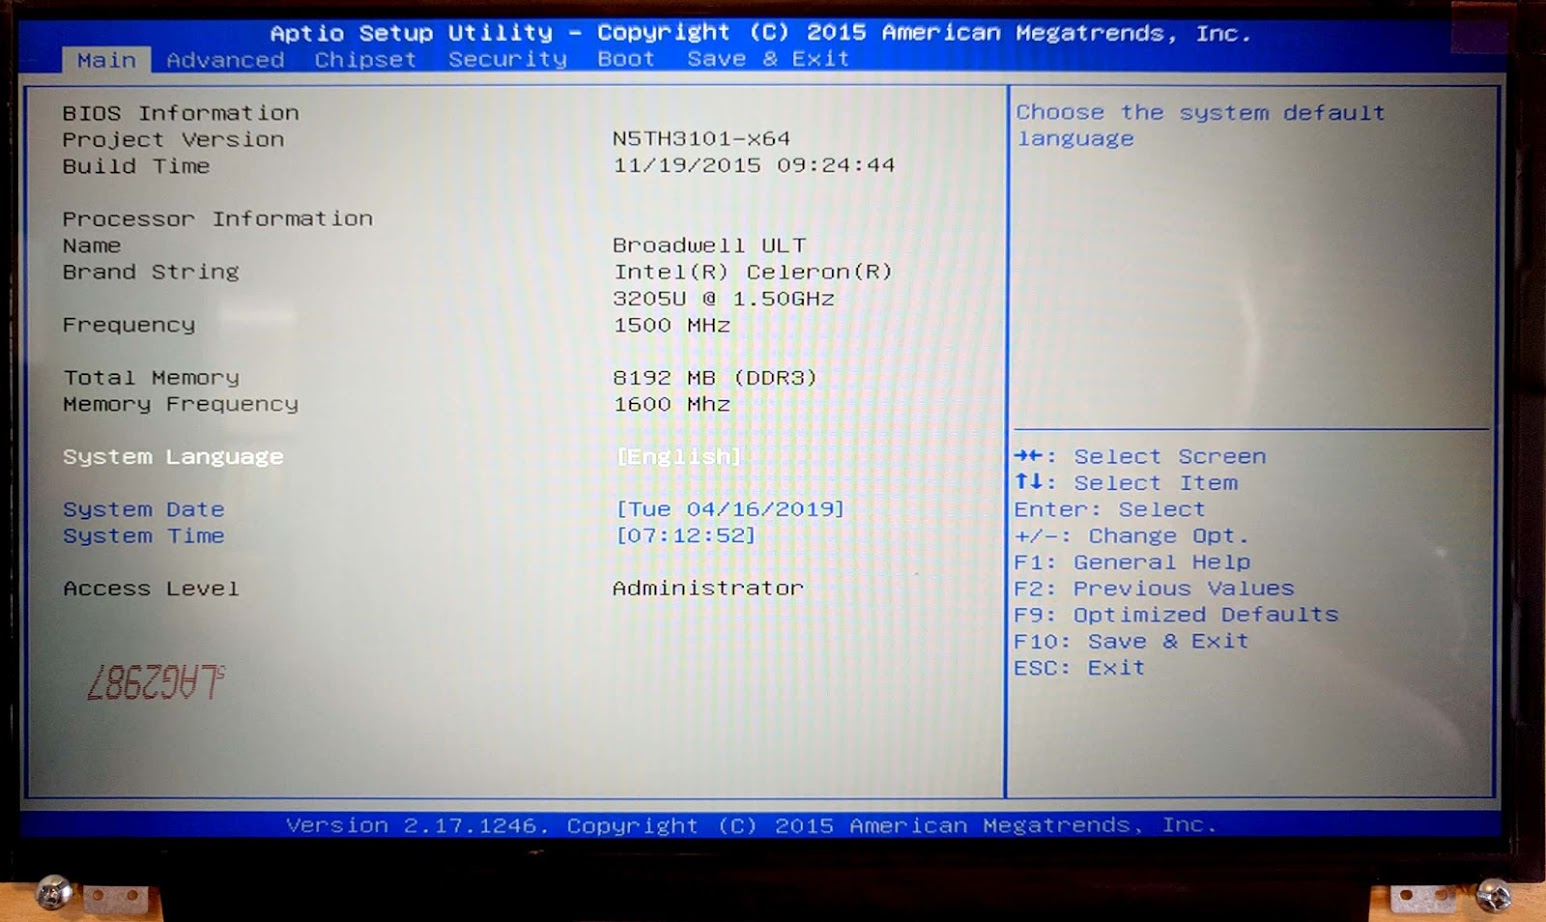
- When booting up the computer, hold the Delete key to enter the BIOS
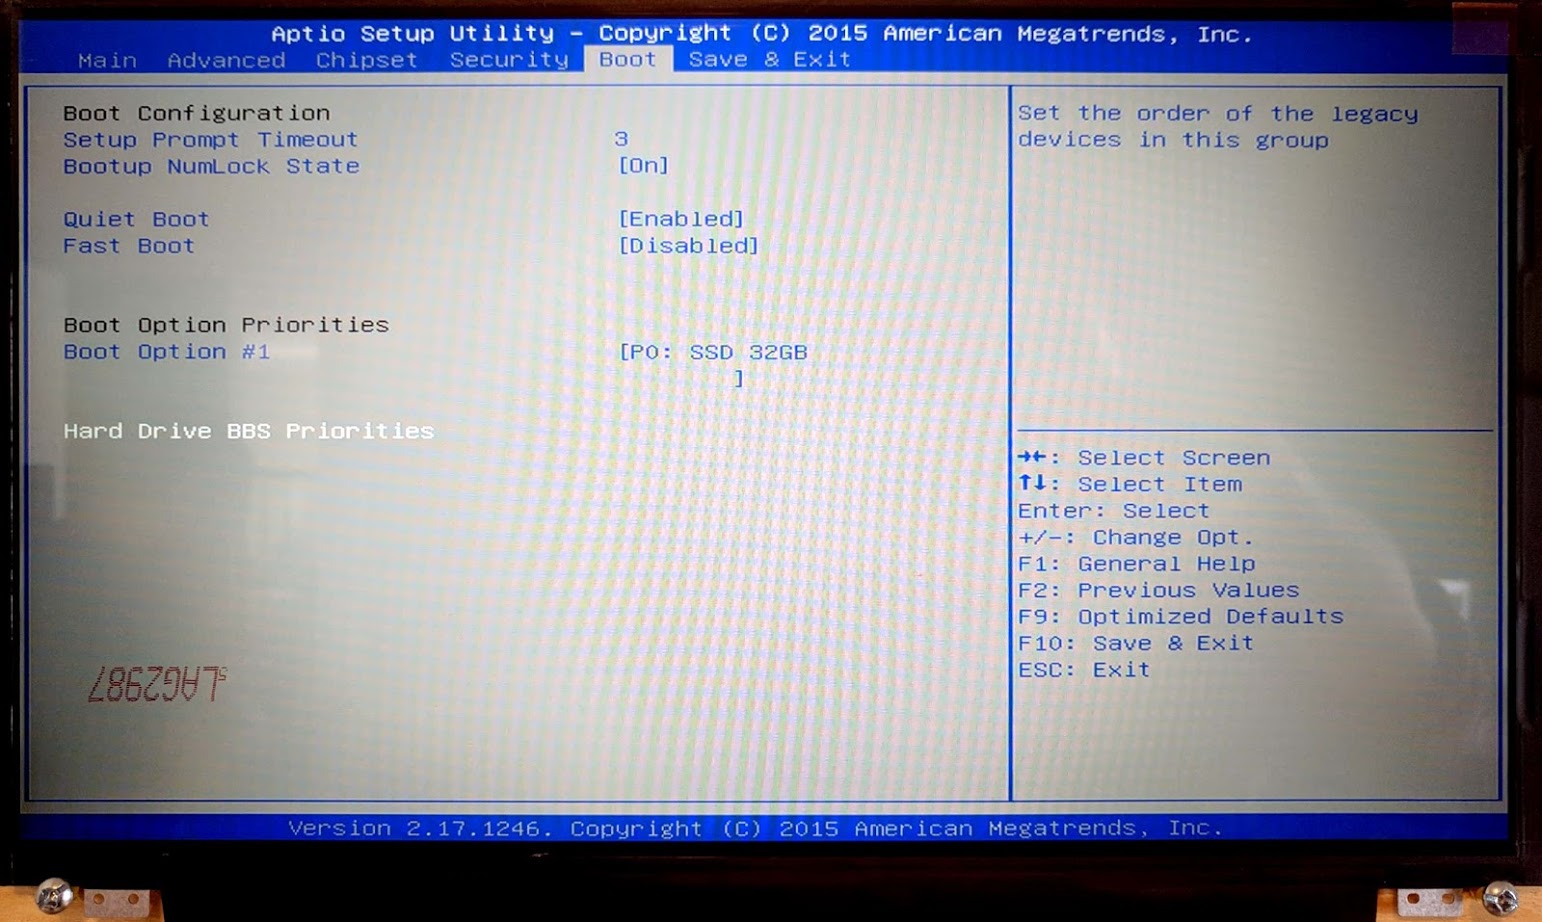
- In the BIOS screen, navigate to the Boot tab
- Select the Hard Drive BBS Priorities
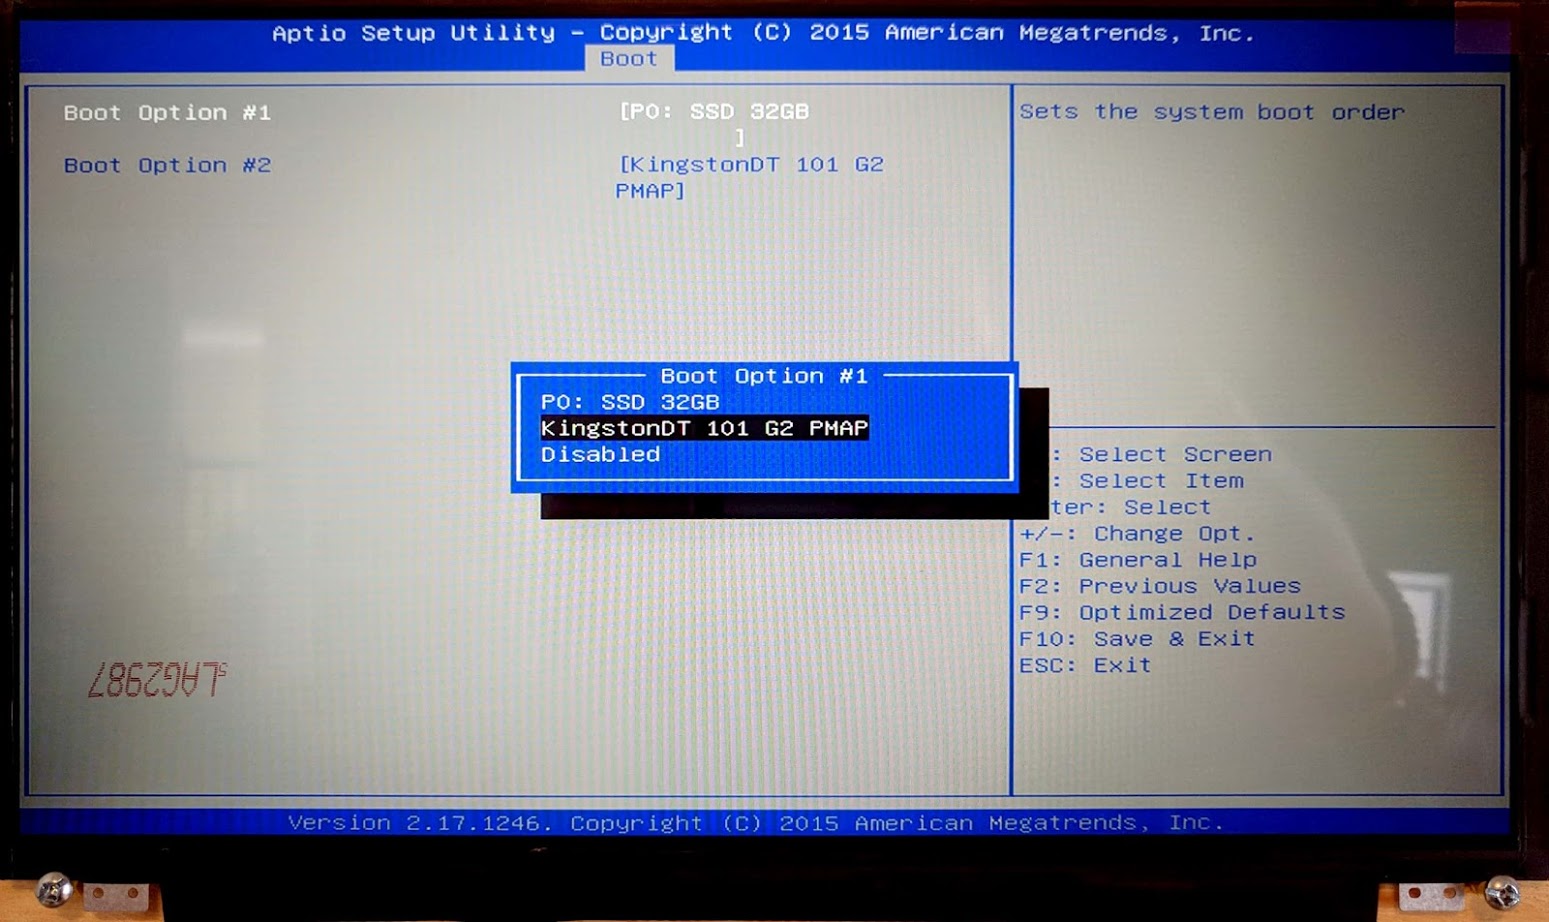
- For Boot Option #1, switch the SSD 32GB to your LiveCD (in our case, the KingstonDT 101 G2 PMAP)
- Save & Exit by pressing F10. The boot-up will begin shortly
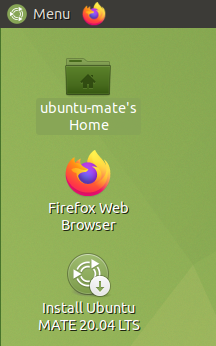
- In the popup window, select the Try Ubuntu MATE option
Step 2: Accessing the necessary folders
The PC should now boot into Ubuntu MATE from the USB that you have previously plugged in. In the example below, we will be retrieving the files for the myCNC profiles:
- From the home screen, open the file browser's home folder, either by clicking the Home folder on the Desktop, or by opening the “Caja” File Browser through the Menu:
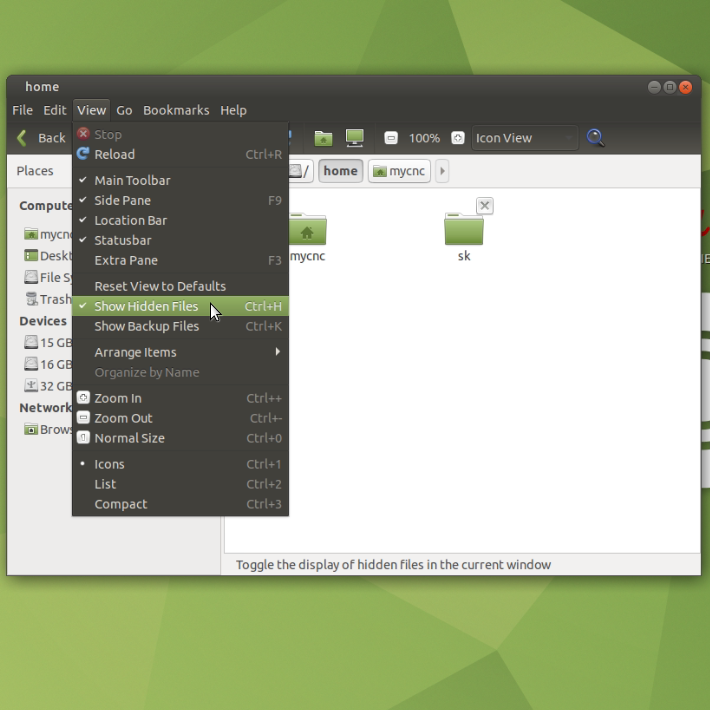
- Switch the “Show hidden files” option to ON in the View menu:
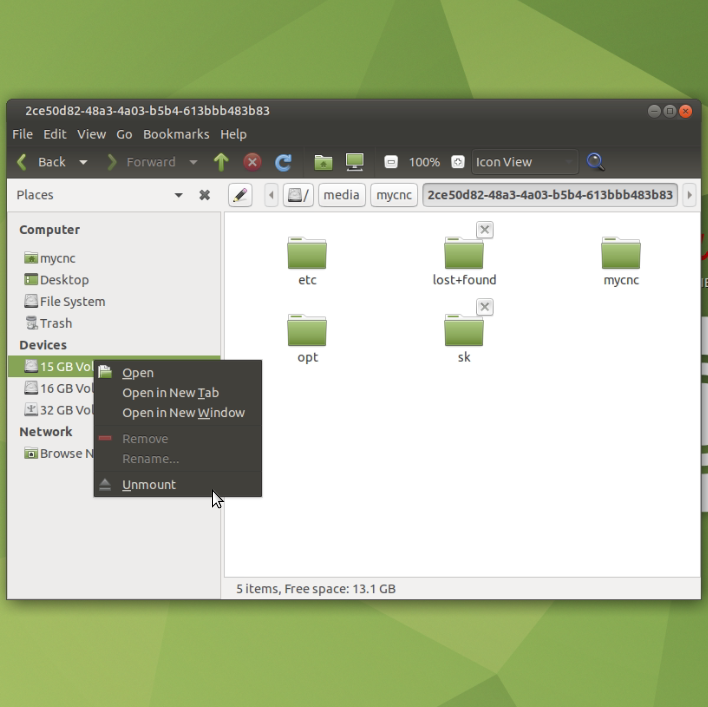
- Click on the volume listed in the Devices section. The file must contain the mycnc/.config folder - if the folder is absent, this is likely not the right drive/partition - in that case, check the other Devices until you locate the mycnc/.config folder:
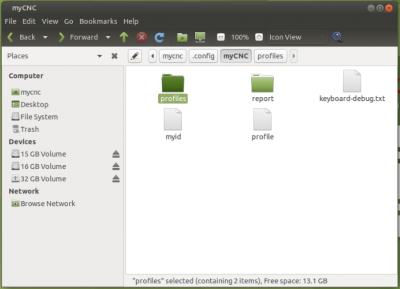
- Within that drive navigate to /home/mycnc/.config/myCNC/profiles
You now have access to the profiles. Copy the profiles over to a different USB stick that you can plug into the PC, or upload them to an online storage drive for further access.
Step 3: Running fsck
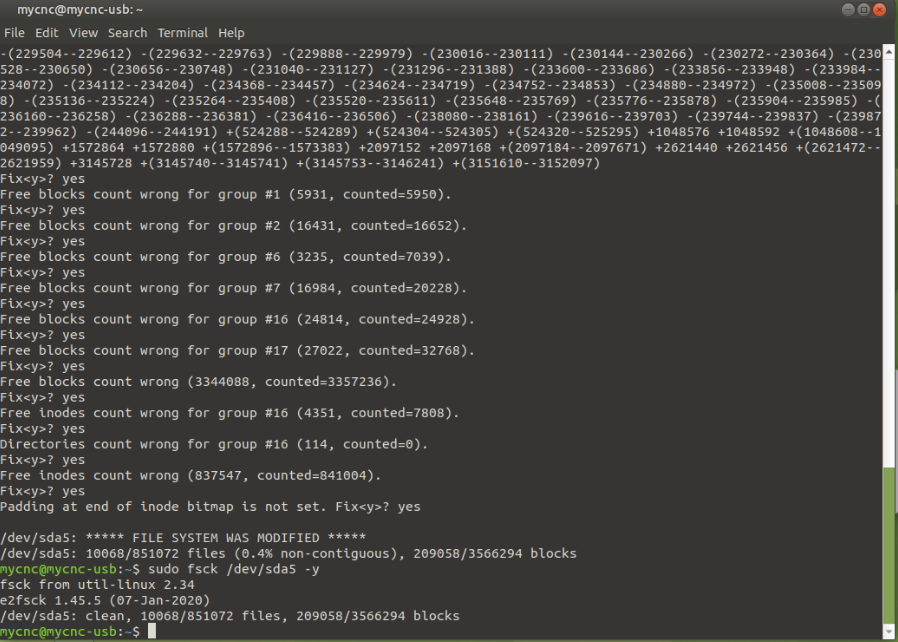
Here, we will be using the terminal and the fsck command to find out whether there are any problems or issues with the file system. Make sure that the specific drive you are diagnosing is UNMOUNTED (this can be done by heading to the file manager and clicking the triangle and rectangle button next to the volume name, or by right-clicking the drive and unmounting it):
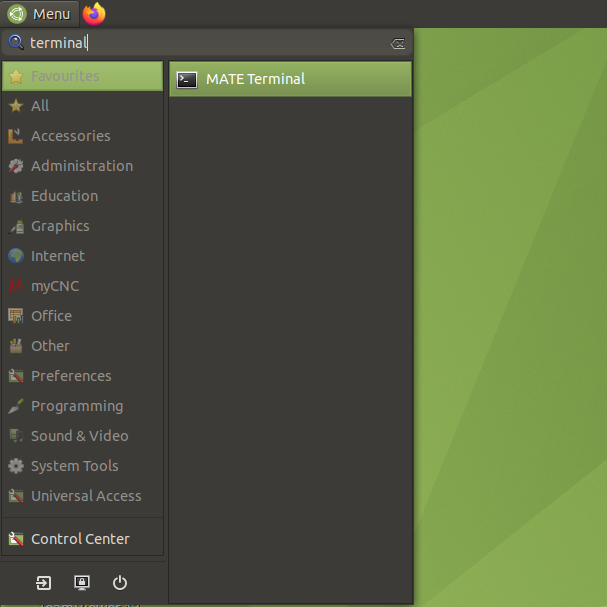
- Open the terminal:
- Type in
sudo fdisk -linto the terminal and press ENTER. This will show a list of drives with all the partitions/volumes on them. - Locate the drive(s) that you want to check (it should have the “SSD” line in its description), and then locate the partition that you will be checking. In this example case, this will be
/dev/sda2and/dev/sda5, as they are both Linux partitions on the SSD (rather than Linux Swap or Extended).
- Type in the command
sudo fsck -y /dev/sda2and press ENTER. Let the system correct any errors that it locates. - Once the above process is done, type in
sudo fsck -y /dev/sda5and press ENTER. Wait while the system corrects any errors.
If fixing the errors on /dev/sda2 and /dev/sda5 does not correct the issue, check the other drives that are connected.
- In the Terminal, type in
fdisk -l /dev/sdb - If the description of the drive mentions “SSD” (similar to the drive above), run the following:
- First, run
sudo fsck -y /dev/sdb2 - After the previous command completes, run
sudo fsck -y /dev/sdb5
Once the errors are fixed, shut down the computer and unplug the LiveUSB. Reboot the system.

