M03 Simple Spindle ON procedure
- M03.plc
#include pins.h //include file with constant definitions
main()
{
  dac01=eparam;         //set spindle speed through DAC
  portset(OUT_SPINDLE); //turn ON Spindle relay
  exit(99);             //normal exit.
};
- OUT_SPINDLE is constant defined in external include file “pins.h”.
- pins.h
#define OUT_SPINDLE 0
#define OUT_COOLANT 5
- #define OUT_SPINDLE 0 - Spindle connected to output #0
It's good to wait some time till spindle achieve rotation speed before start moving So we add a 2 seconds delay before exit from M03 procedure. Advanced procedure may look on Spindle Rotation sensor or spindle encoder value to detect spindle speed is good to start.
- M03.plc
#include pins.h
main()
{
  dac01=eparam;         //set spindle speed through DAC
  portset(OUT_SPINDLE); //turn ON Spindle relay
  timer=2000;           //2000 msec delay fixed
  do{ timer--; }while (timer>0);
  exit(99);             //normal exit.
};
In this example delay value is fixed 2 seconds and operator will not be able to change it. In some cases will be better to have spindle ON delay value as parameter and provide interface for operator to change this value.
To get it we need to define variable name in vars.h include file -
- vars.h
#define spindle_on_delay var05
and change spindle delay to this variable
- M03.plc
#include pins.h
#include vars.h
main()
{
  dac01=eparam;           //set spindle speed through DAC
  portset(OUT_SPINDLE);   //turn ON Spindle relay
  timer=spindle_on_delay; //delay <<<< variable
  do{ timer--; }while (timer>0);
  exit(99);             //normal exit.
};
PLC variable var05 is value for spindle ON delay. The variable will be initialized to correct delay value if we add its declaration in plc-config.xml, section for M03 procedure -
- plc-config.xml
<?xml version="1.0" encoding="UTF-8"?>
<!DOCTYPE CNC>
<plc-configuration version="1.0">
    <plc-function name="M03" alias="M04;M05;OFF;SPN">
        <message>Spindle</message>
        <message_ru>Шпиндель</message_ru>
        <message_kr>스핀들</message_kr>
        <item>
            <value number="5" name="plc-var-spindle-on-delay" suffix="ms"
            type="numpad" min="0" step="250" max="5000">500</value>
            <message>Spindle On Delay,ms</message>
            <message_ru>Время на включение шпинделя,мс</message_ru>
            <message_pl>Opóźnienie włączenia wrzeciona, ms</message_pl>
            <message_kr>스핀들 시작지연시간,ms</message_kr>
        </item>
    </plc-function>
</plc-configuration>
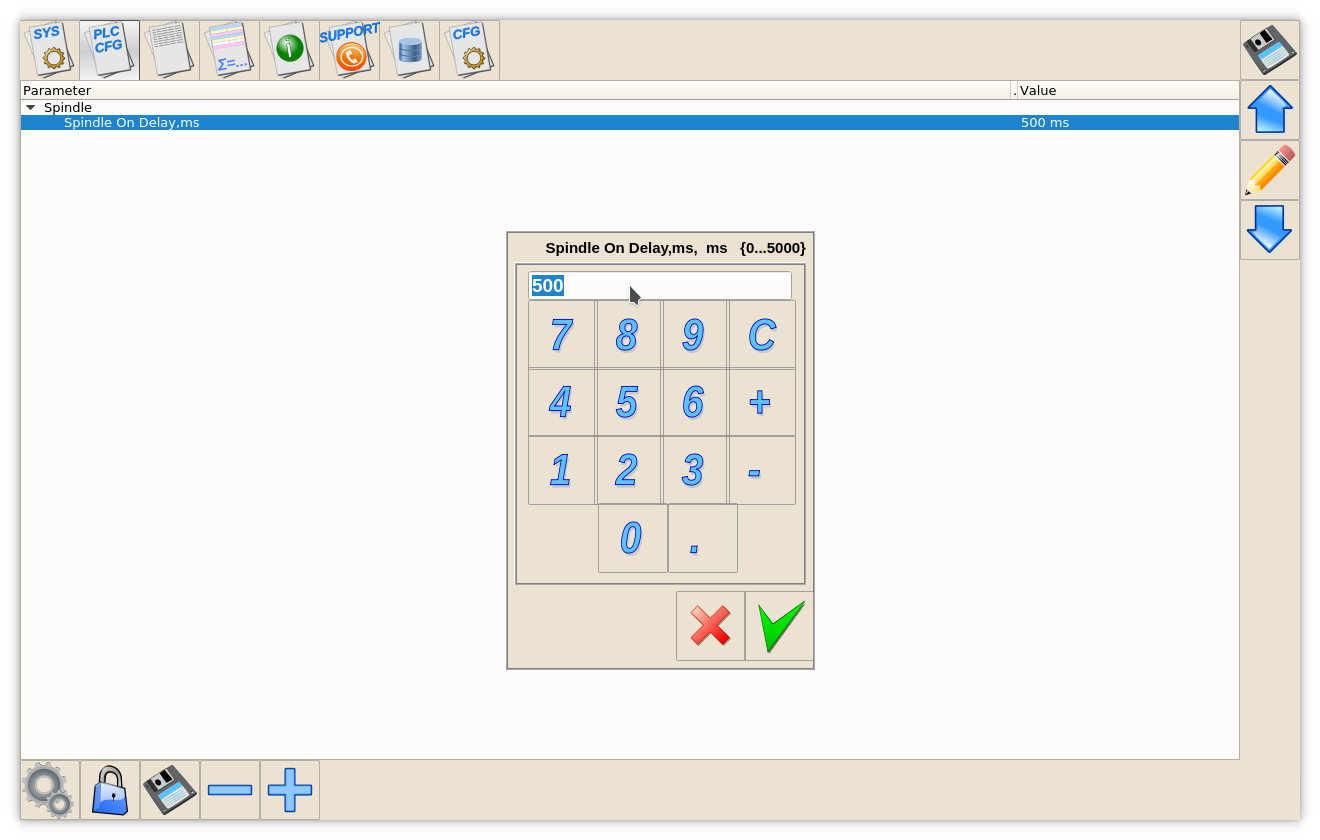
- number=“5” connection XML item with var05 PLC variable
- pname=“plc-var-spindle-on-delay” - name definition to add screen items \\(like spinbox, numpad or display) to edit variable value
- suffix=“ms” - suffiz to display value
- type=“numpad” - screen type to edit variable in PLC Cfg dialog
- min=“0” step=“250” max=“5000” min, max value range, step for valu inc/dec
PLC Configuration dialog with “Spindle On Delay” is shown below 
It's possible to put graphics item to any of GUI widget and connect it with XML item name to edit PLC variable value directly from GUI.
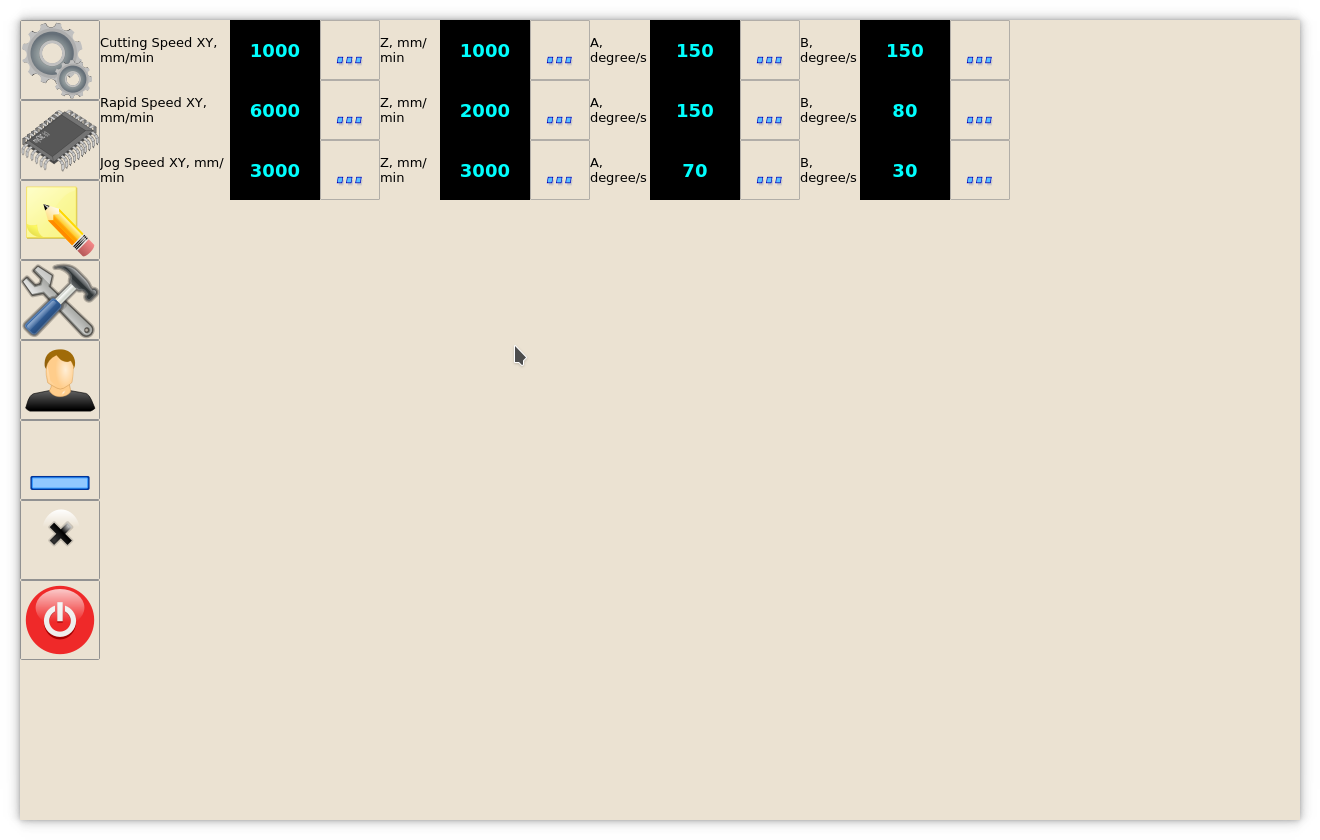
Let's add item to User widget of “1280M5” profile. User Widget before is -  User Widget Configuration in “1280M5” profile is separated in user-m5.xml XML file which is included in main cnc-screen.xml
Items setup in user-m5.xml is based in Layout subsystem. Complete screen divided to 4(5) layers:
- XY
- Z
- A
- B
- (Reserved)
Reserved Layer is used for plasma profile for plasma-gas specific settings (check user-plasma.xml configuration XML include for more details)
To add new Item -
- Add/Fix new layout after layout for “B”
- Add Widget type myitems to this layout with name “user-spindle-01”
<quick-widget-layout>
<current>user-tab</current>
  <layout image="user" name="user-tab" orientation="horizontal">
   <widget stretch="0" spacing="0" name="tab-bar" orientation="vertical">myitems</widget>
  <layout orientation="vertical">
   <widget stretch="0" spacing="0" name="user-speeds-xy" orientation="vertical">myitems</widget>
   <stretch stretch="1"/>
  </layout>
  <layout orientation="vertical">
   <widget stretch="0" spacing="0" name="user-speeds-z" orientation="vertical">myitems</widget>
   <stretch stretch="1"/>
  </layout>
  <layout orientation="vertical">
   <widget stretch="0" spacing="0" name="user-speeds-a" orientation="vertical">myitems</widget>
   <stretch stretch="1"/>
  </layout>
  <layout orientation="vertical">
   <widget stretch="0" spacing="0" name="user-speeds-b" orientation="vertical">myitems</widget>
   <stretch stretch="1"/>
  </layout>
  <stretch stretch="1"/>

<!-- NEW LAYOUT DEFINITION START -->
  <layout orientation="vertical">
   <widget stretch="0" spacing="0" name="user-spindle-01" orientation="vertical">myitems</widget>
   <stretch stretch="1"/>
  </layout>
<!-- NEW LAYOUT DEFINITION END-->

</quick-widget-layout>
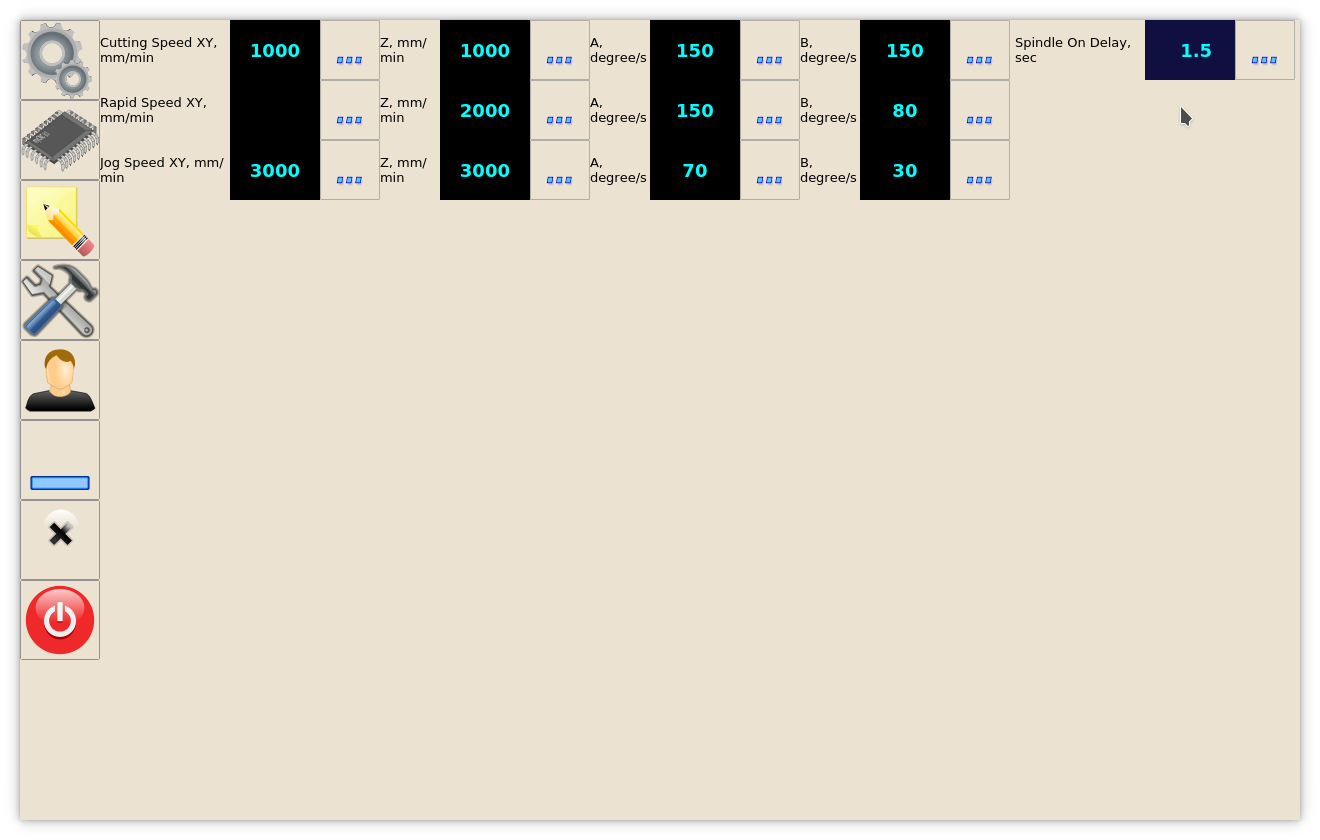
- Add definition for Numpad and connect it with XML variable with attribute pname=“plc-var-spindle-speed-on-delay”
<gitem where="user-spindle-01"
type="combo-numpad"
action="item:plc-var-spindle-on-delay"
name="display-plc-var-spindle-on-delay"
bgColor="#101040" fgColor="cyan"
displayWidth="90" height="60" labelWidth="130"
fontSize="18" fontStyle="bold" format="%5.1f" K="0.001"
image="3dots" >
  <message>Spindle On Delay, sec</message>
  <message_ru>Задержка на включение шпинделя, сек.</message_ru>
</gitem>
- where=“user-spindle-01” - Parent widget name to put the item
- type=“combo-numpad” Combined type - DRO (display), button, Numpad dialog opened when button pressed to change Item Value. Item optimized to use with Touch Screen monitors.
- action=“item:plc-var-spindle-on-delay” - attach button to edit XML PLC variable with name “plc-var-spindle-on-delay”
- name=“display-plc-var-spindle-on-delay” - attach DRO/display to show XML/PLC variable value
- bgColor=“#205020” fgColor=“cyan” - Background and foreground colors for Item
- displayWidth=“90” - width for DRO(display)
- height=“60 - Item height
- labelWidth=“130” - Label width
- fontSize=“18” fontStyle=“bold” - Font Size and Style for DRO/display. If Label font should be redefined use “labelFontSize”, “labelFontStyle”, “labelAlignment” attributes (Case Sensitive).
- format=”%5.1f“ - C-style format for DRO
- K=“0.001” - All timings in PLC are in miliseconds. To show value in seconds can be used ratio defined in “K” attribute
- image=“3dots” - image skin for Button

