Table of Contents
Firmware Reflash
As of June 2023, the boards sold by Puruvesi Automation feature the simplified process of updating the controller firmware via the bootloader-firmware-update command that can be assigned to a button or a GUI element within a myCNC profile. Normally, when using the button which features this command, the process consists of simply pressing the GUI element which launches this command and waiting for the firmware reflash to complete. On updated profiles/firmware versions (as of June 2023) the button to reflash the firmware is available in the User Settings:
All that is required to reflash the firmware in that case is to have the board connected via the Ethernet cable. Pressing the button will launch the firmware reflash (no need for the mini-USB/micro-USB cords that had to be used on the older boards and older firmware versions, or closing/opening jumper cables).
However, on older boards or in cases where a full manual firmware reflash is necessary, a more comprehensive method of updating the firmware “from the ground up” is available to the user. Note that this method should not be used unless the bootloader-firmware-update option is unuseable for any reason.
The process for updating the firmware this way is described below.
Warnings and comments


Manual Firmware Reflash procedure
STEP 1: Prior to the reset, make sure that the controller has the default IP address of 192.168.4.78. If unsure, please consult the following manuals:
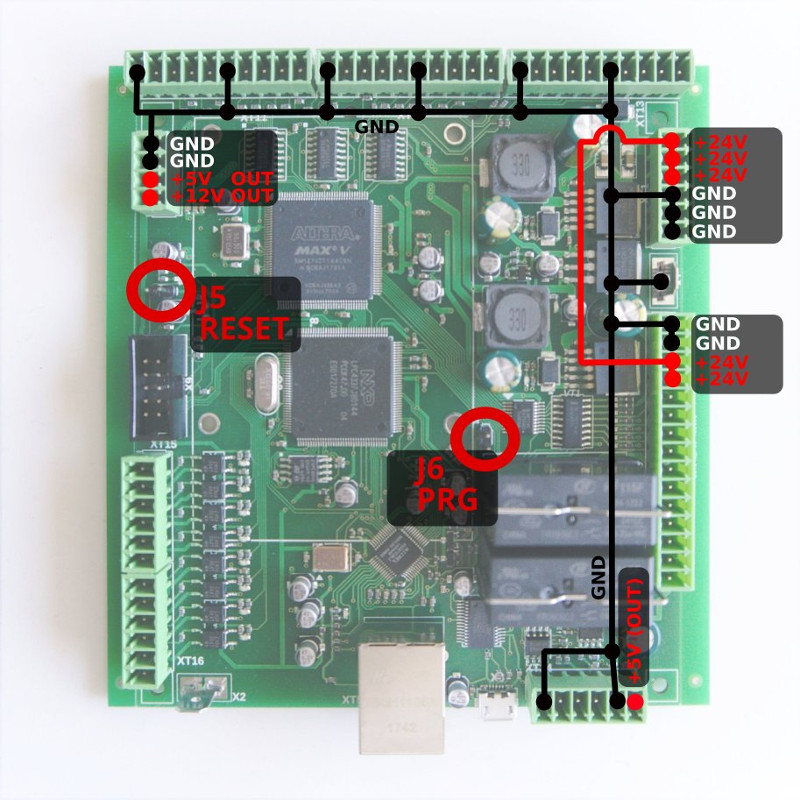
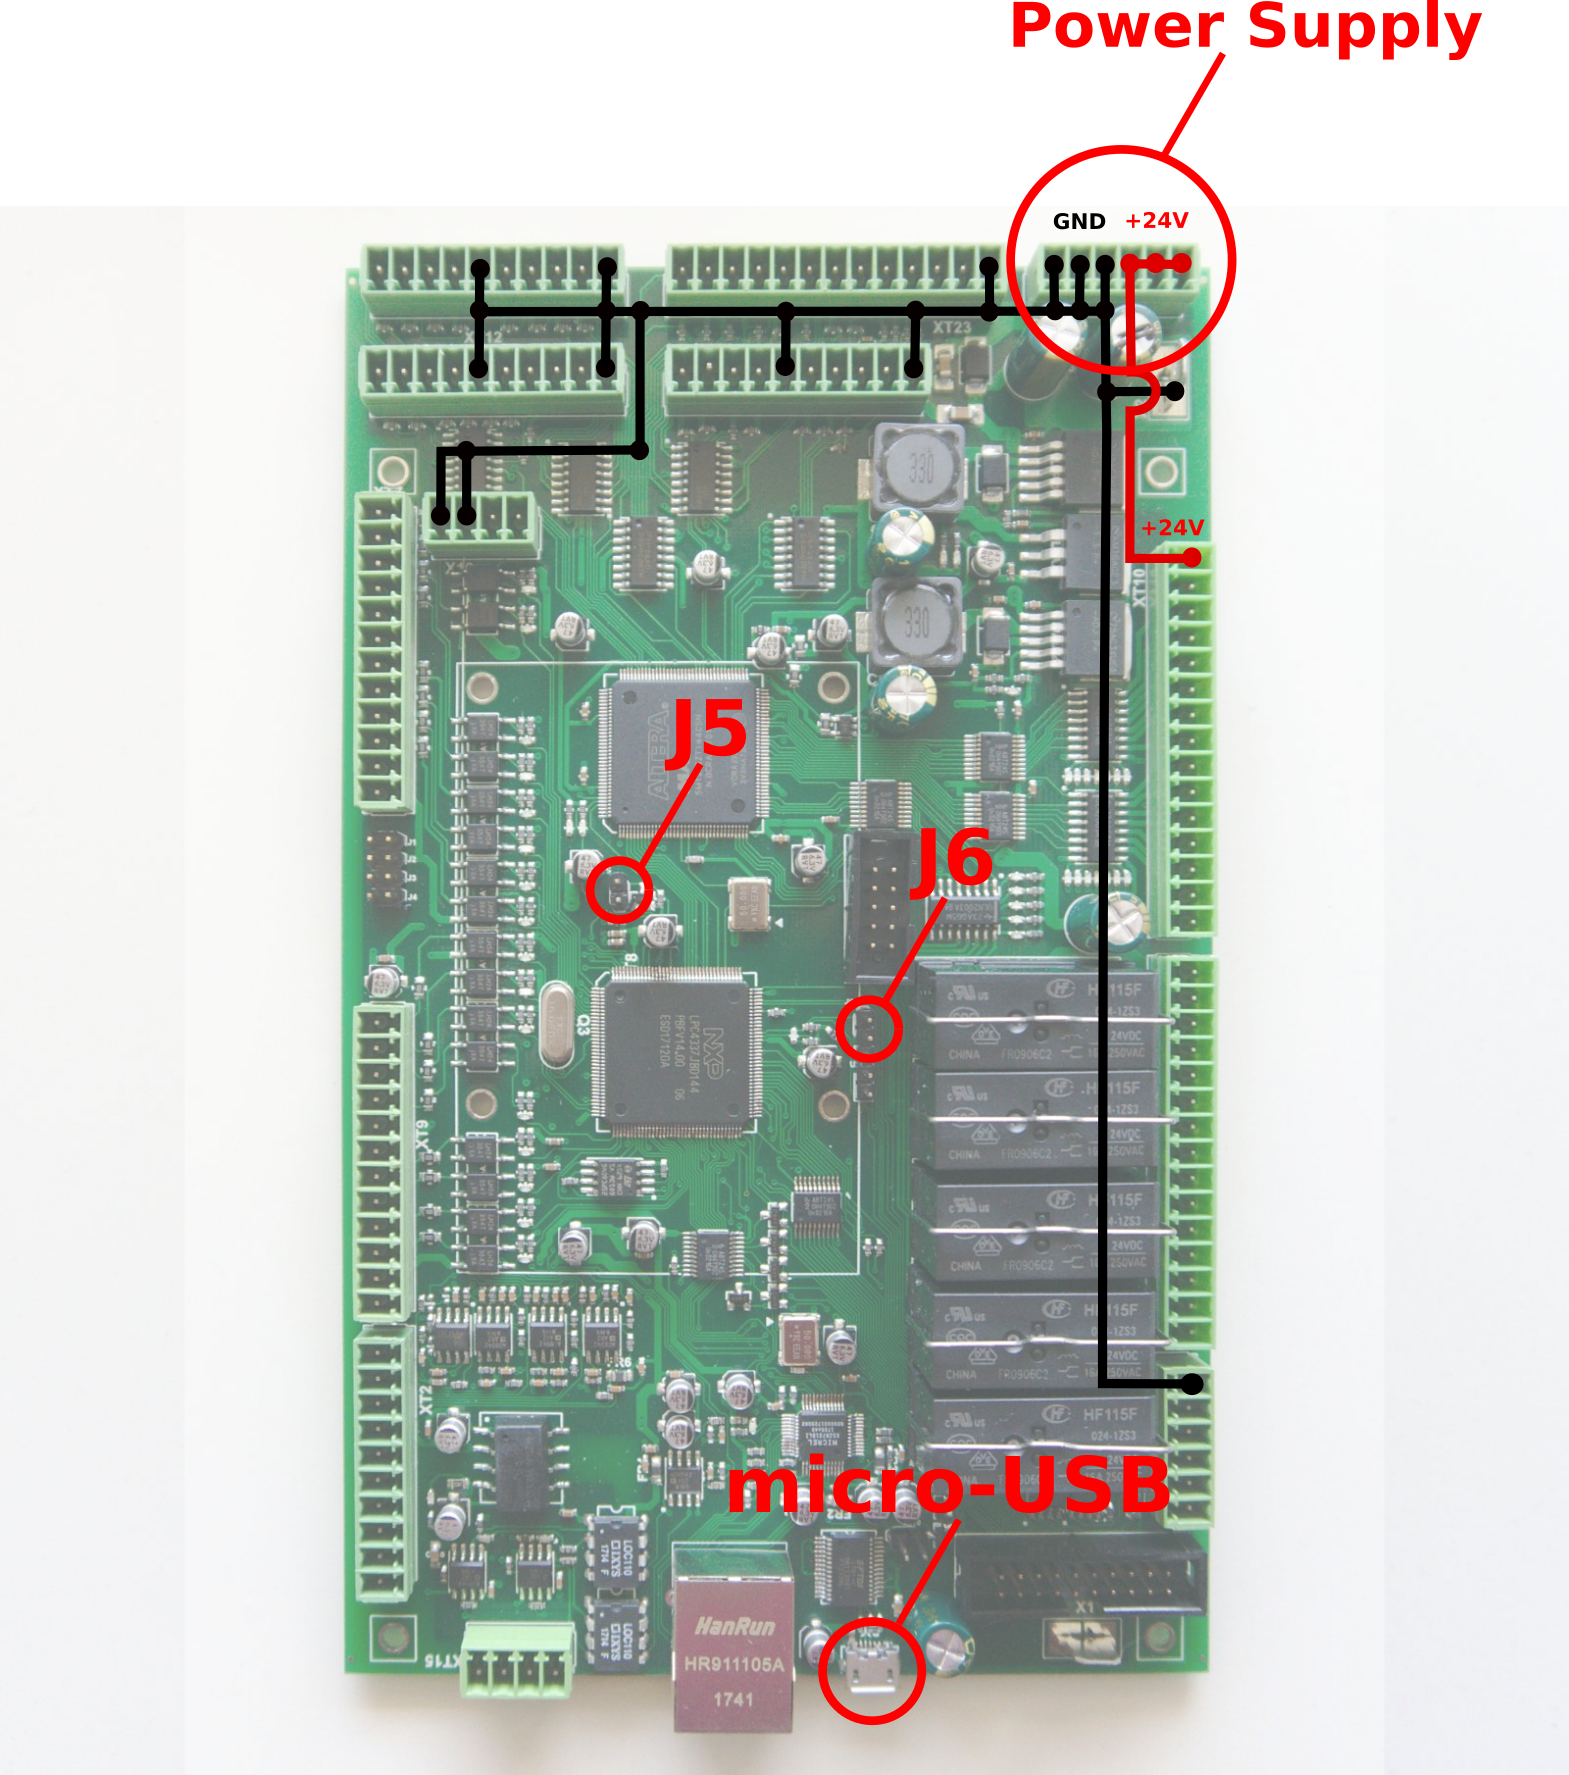
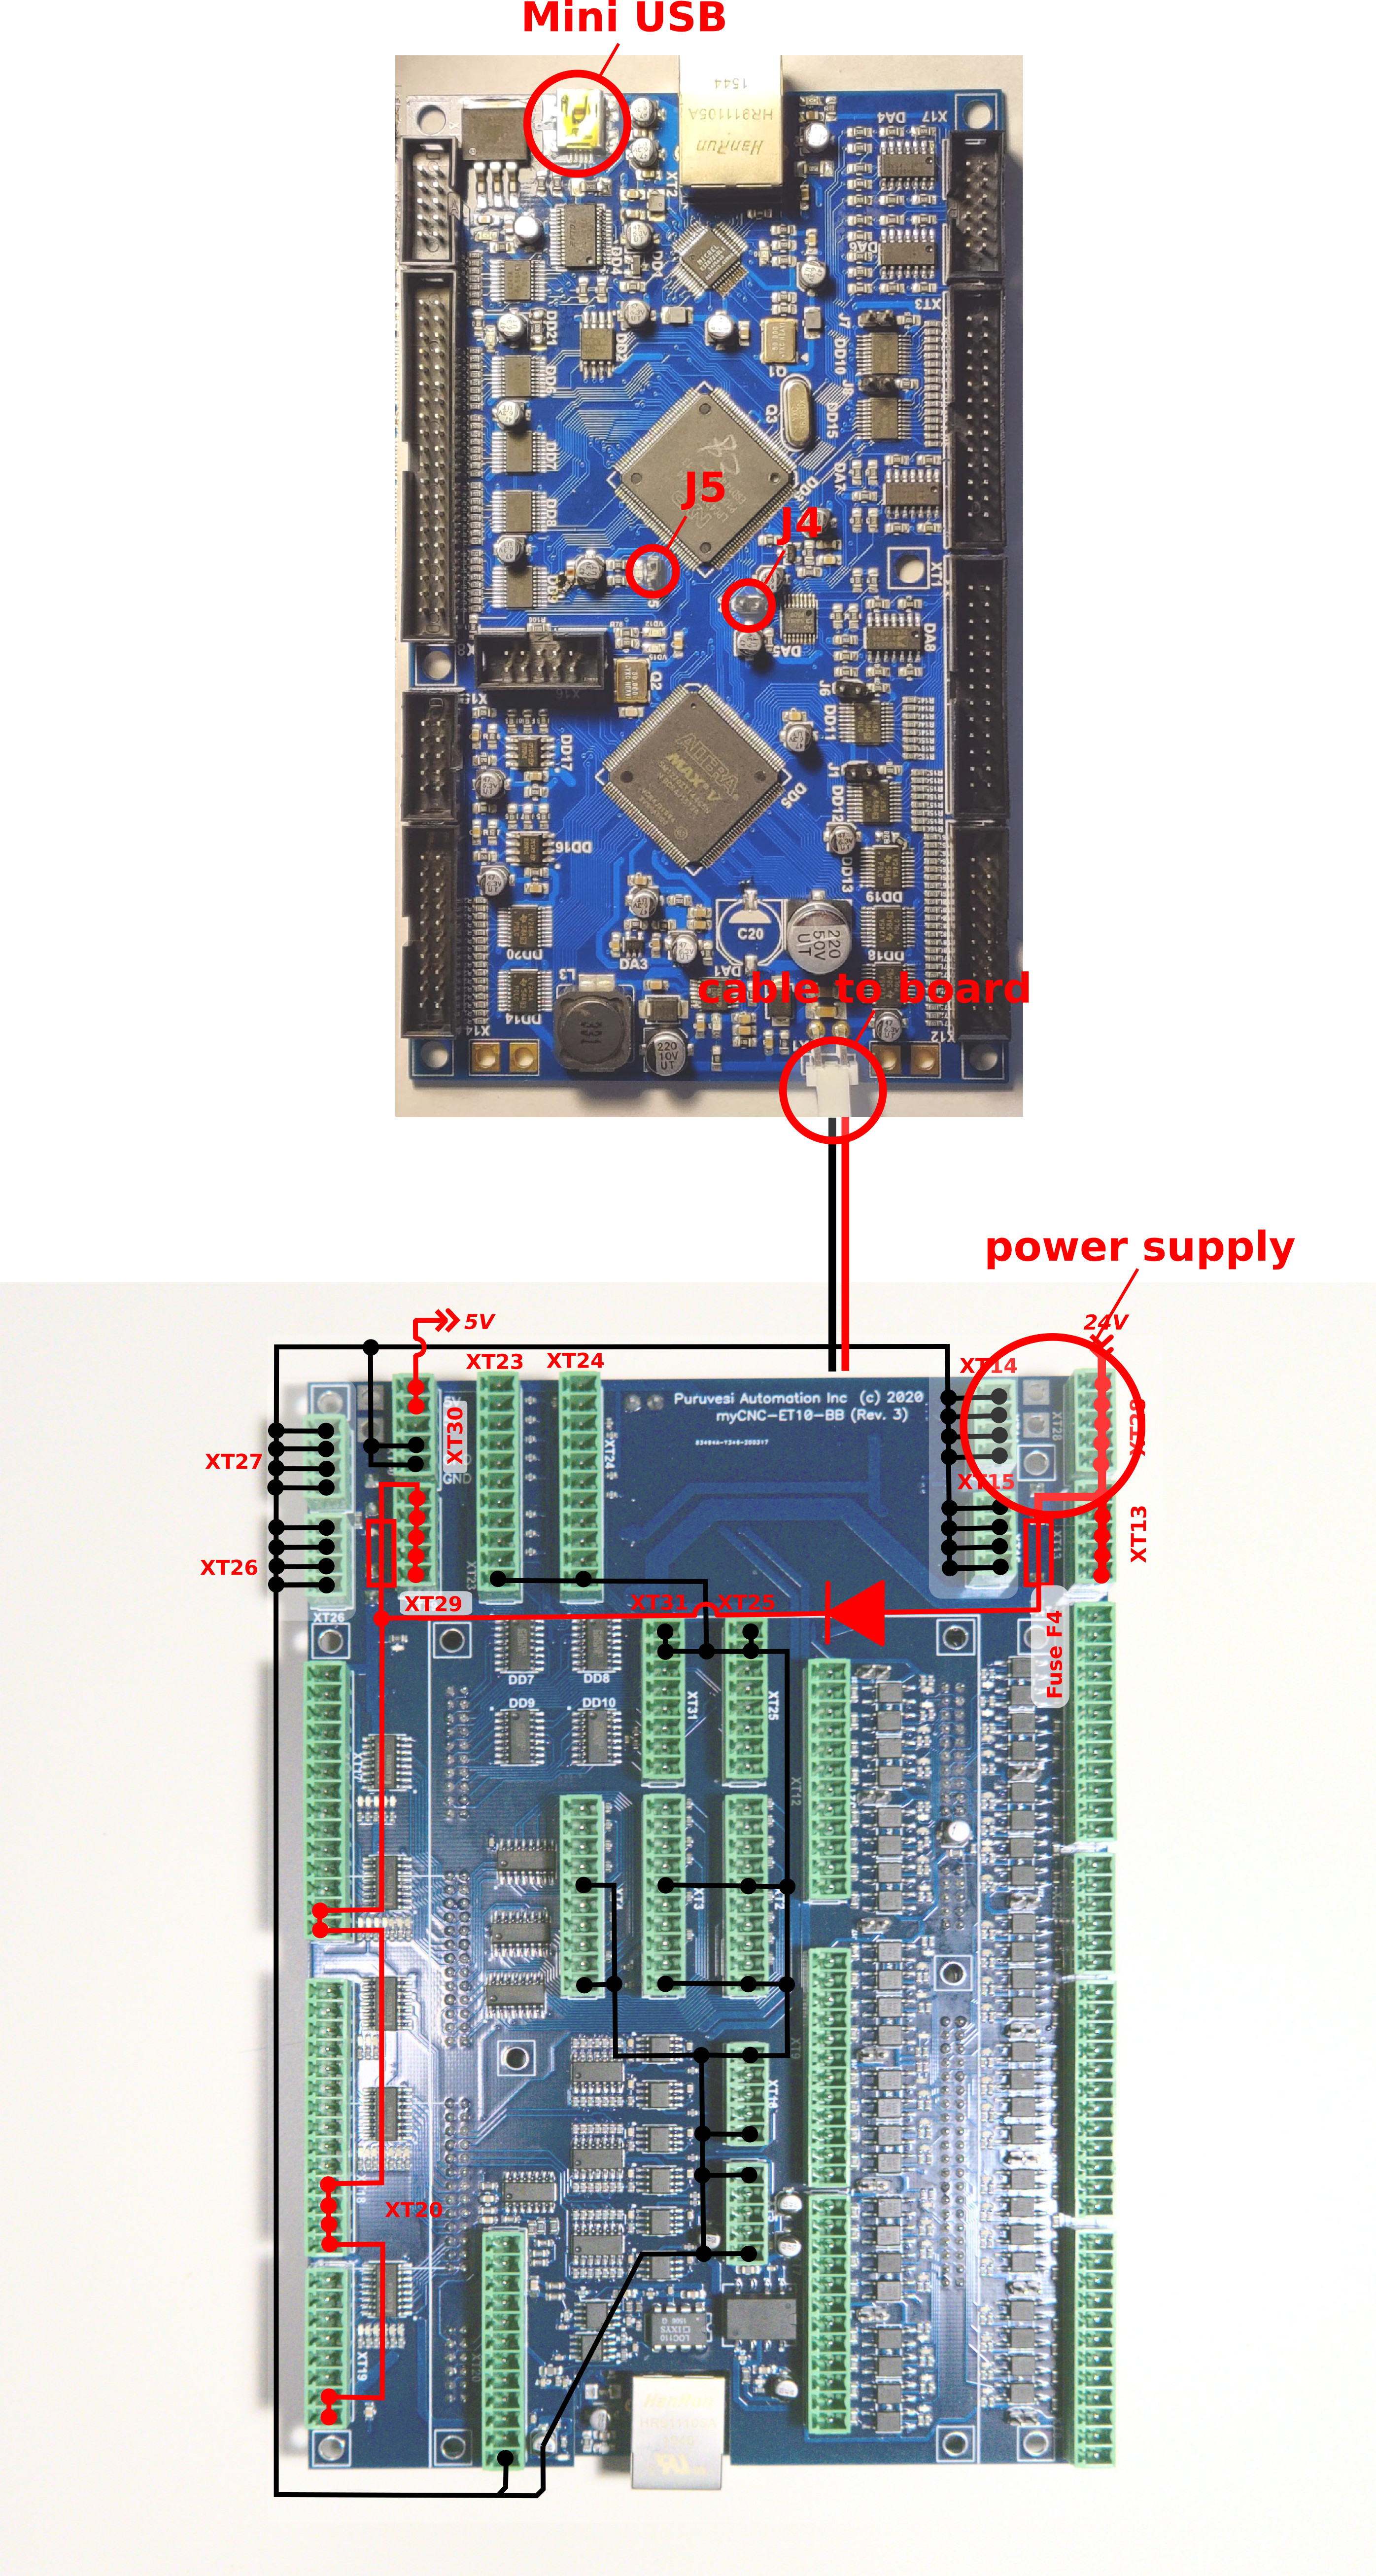
STEP 2: Select your board and follow the steps below to begin the reflash process. The physical connections and jumpers that need to be closed will be different depending on the board model.
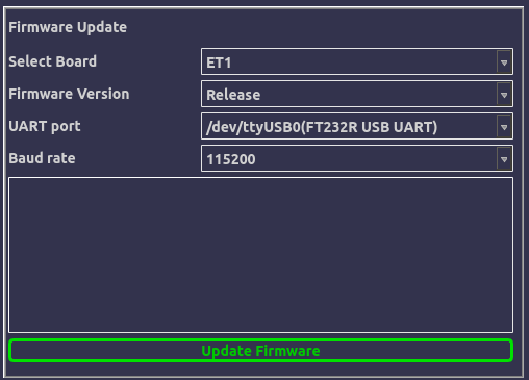
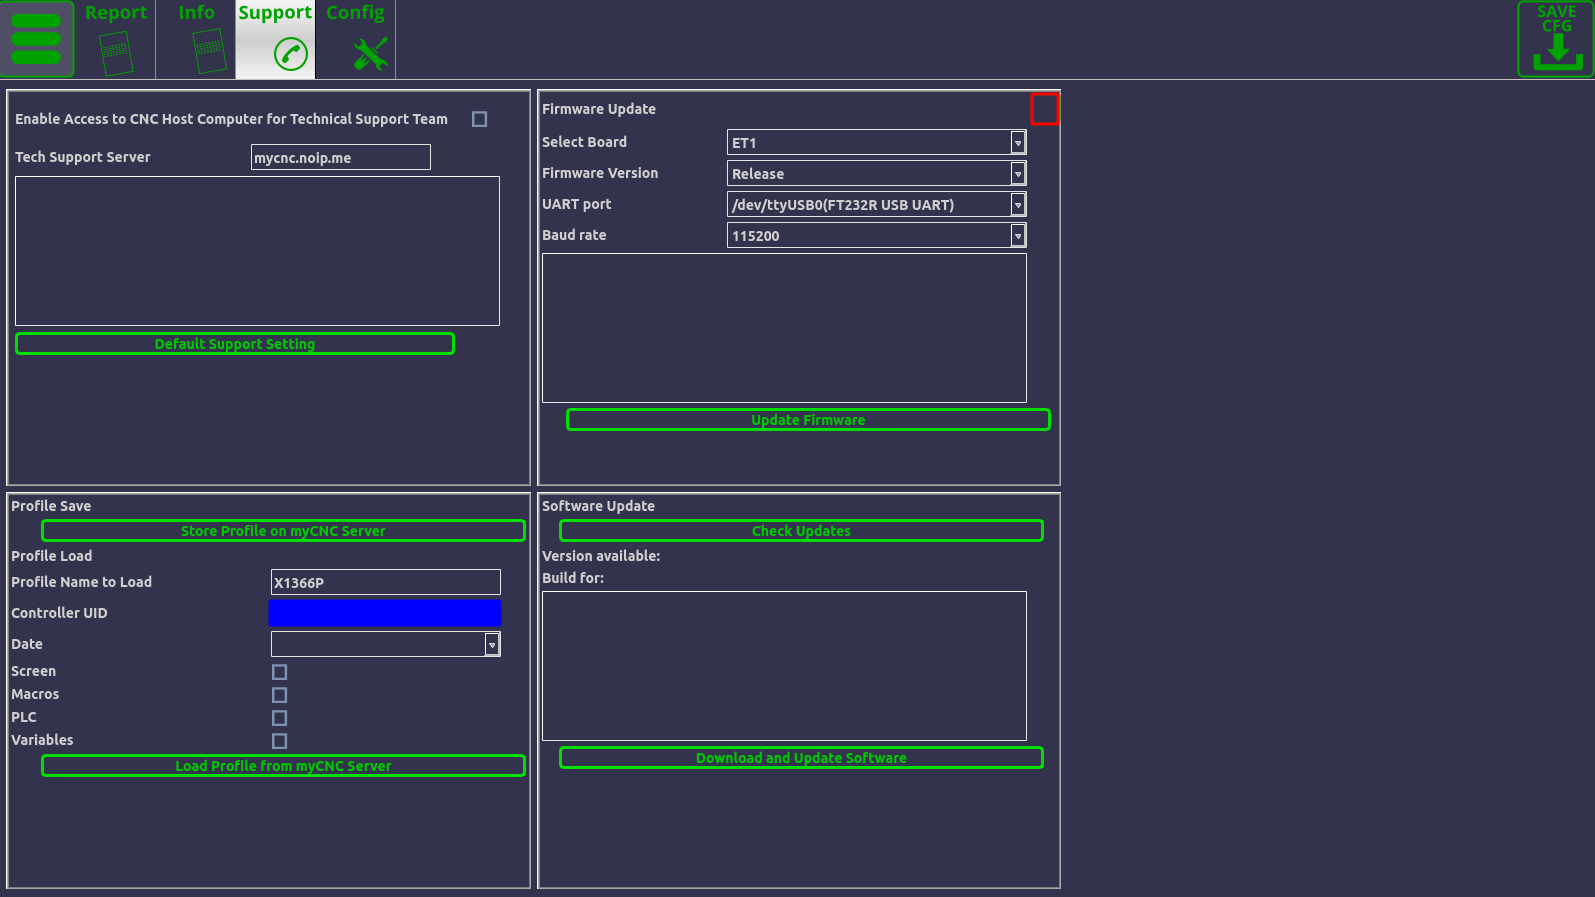
STEP 3: In the Select Board field, select “ET1” (
STEP 4: Press the Update Firmware button.
STEP 5: After the firmware has been updated, remove the jumpers and restart the board. The board should now be assembled (if it has been disassembled before, for example in the case of the ET10 controller).
STEP 6: In the Support tab, click the area highlighed in red in the photo below:
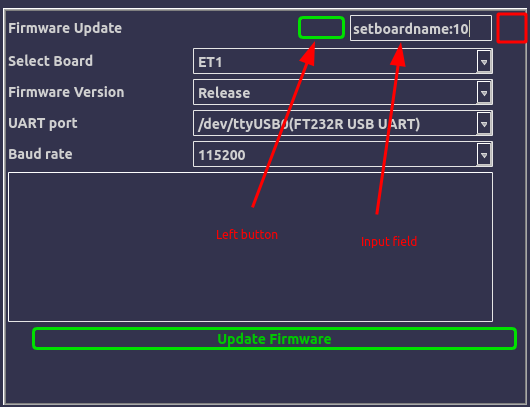
STEP 7: In the input field that will appear, enter “setboardname:”, followed by the number that indicates the version of your board. For instance, for the ET6 board, enter setboardname:6, for the ET9 enter setboardname:9, etc.
STEP 8: Press the button that appears to the left of the input field:
STEP 9: Head into the User Settings and launch the firmware reflash. The bootloader setup is now complete:
Once the bootloader setup (the steps 1-9 above) have been completed, you can use the bootloader-firmware-update command (via a button in the User Settings of your profile) to quickly reflash the firmware without going through the manual steps. At this point, only the connection via the Ethernet port is required (no mini/micro-USB cord or jumper cables).


