This is an old revision of the document!
Table of Contents
myCNC Flatbed Correction
This article discusses the flatbed correction feature built into myCNC software which is often useful when the working table is not even or has certain spots which are higher or lower than the reference position. This is especially useful in cases when something like a tangential knife needs to go over the uneven table, with up to a millimeter of play being involved, resulting in a cut that does not actually go through the working material properly.
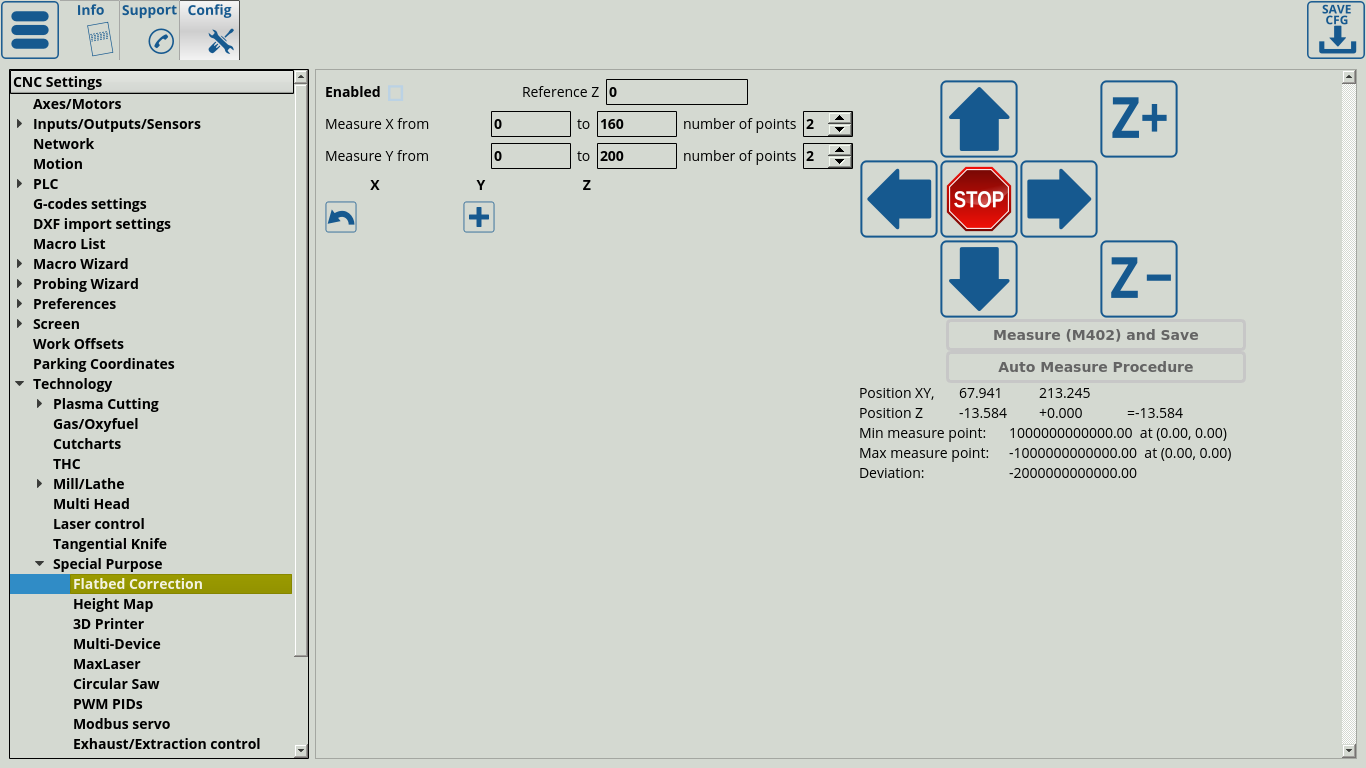
In order to account for this, go into Settings > Config > Technology > Special Purpose > Flatbed Correction.
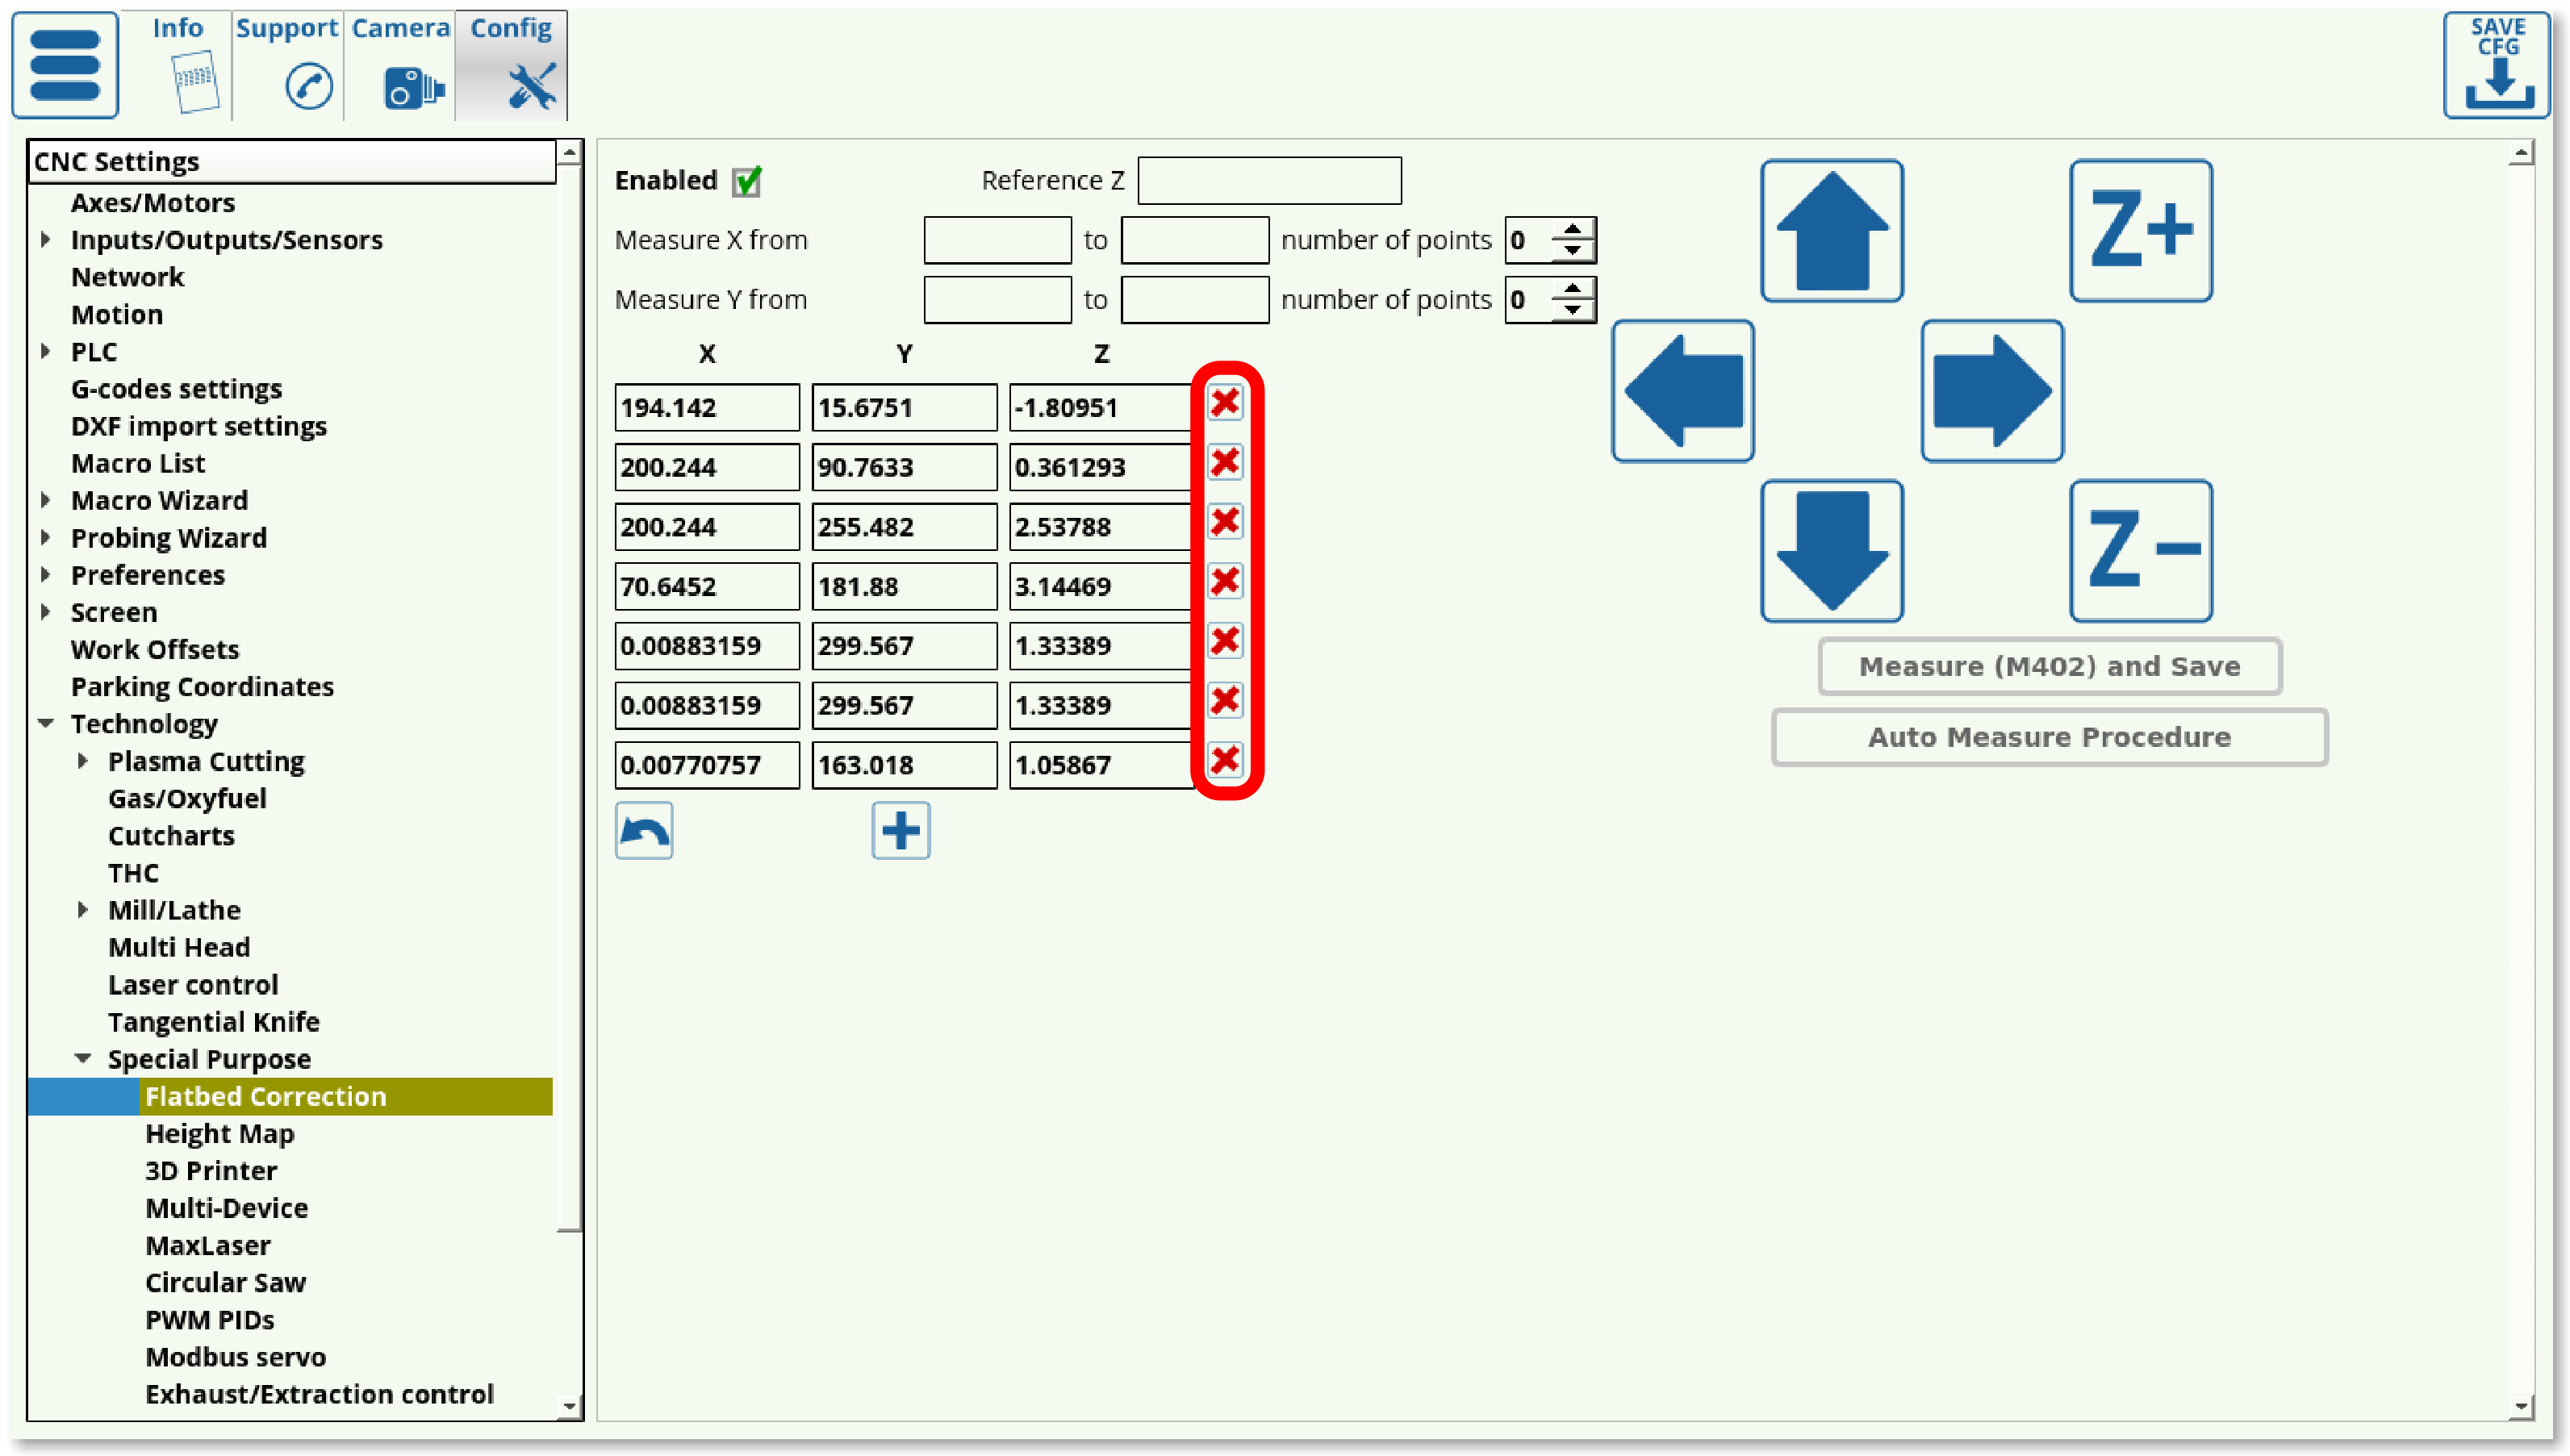
The screen presented to you will be the following:
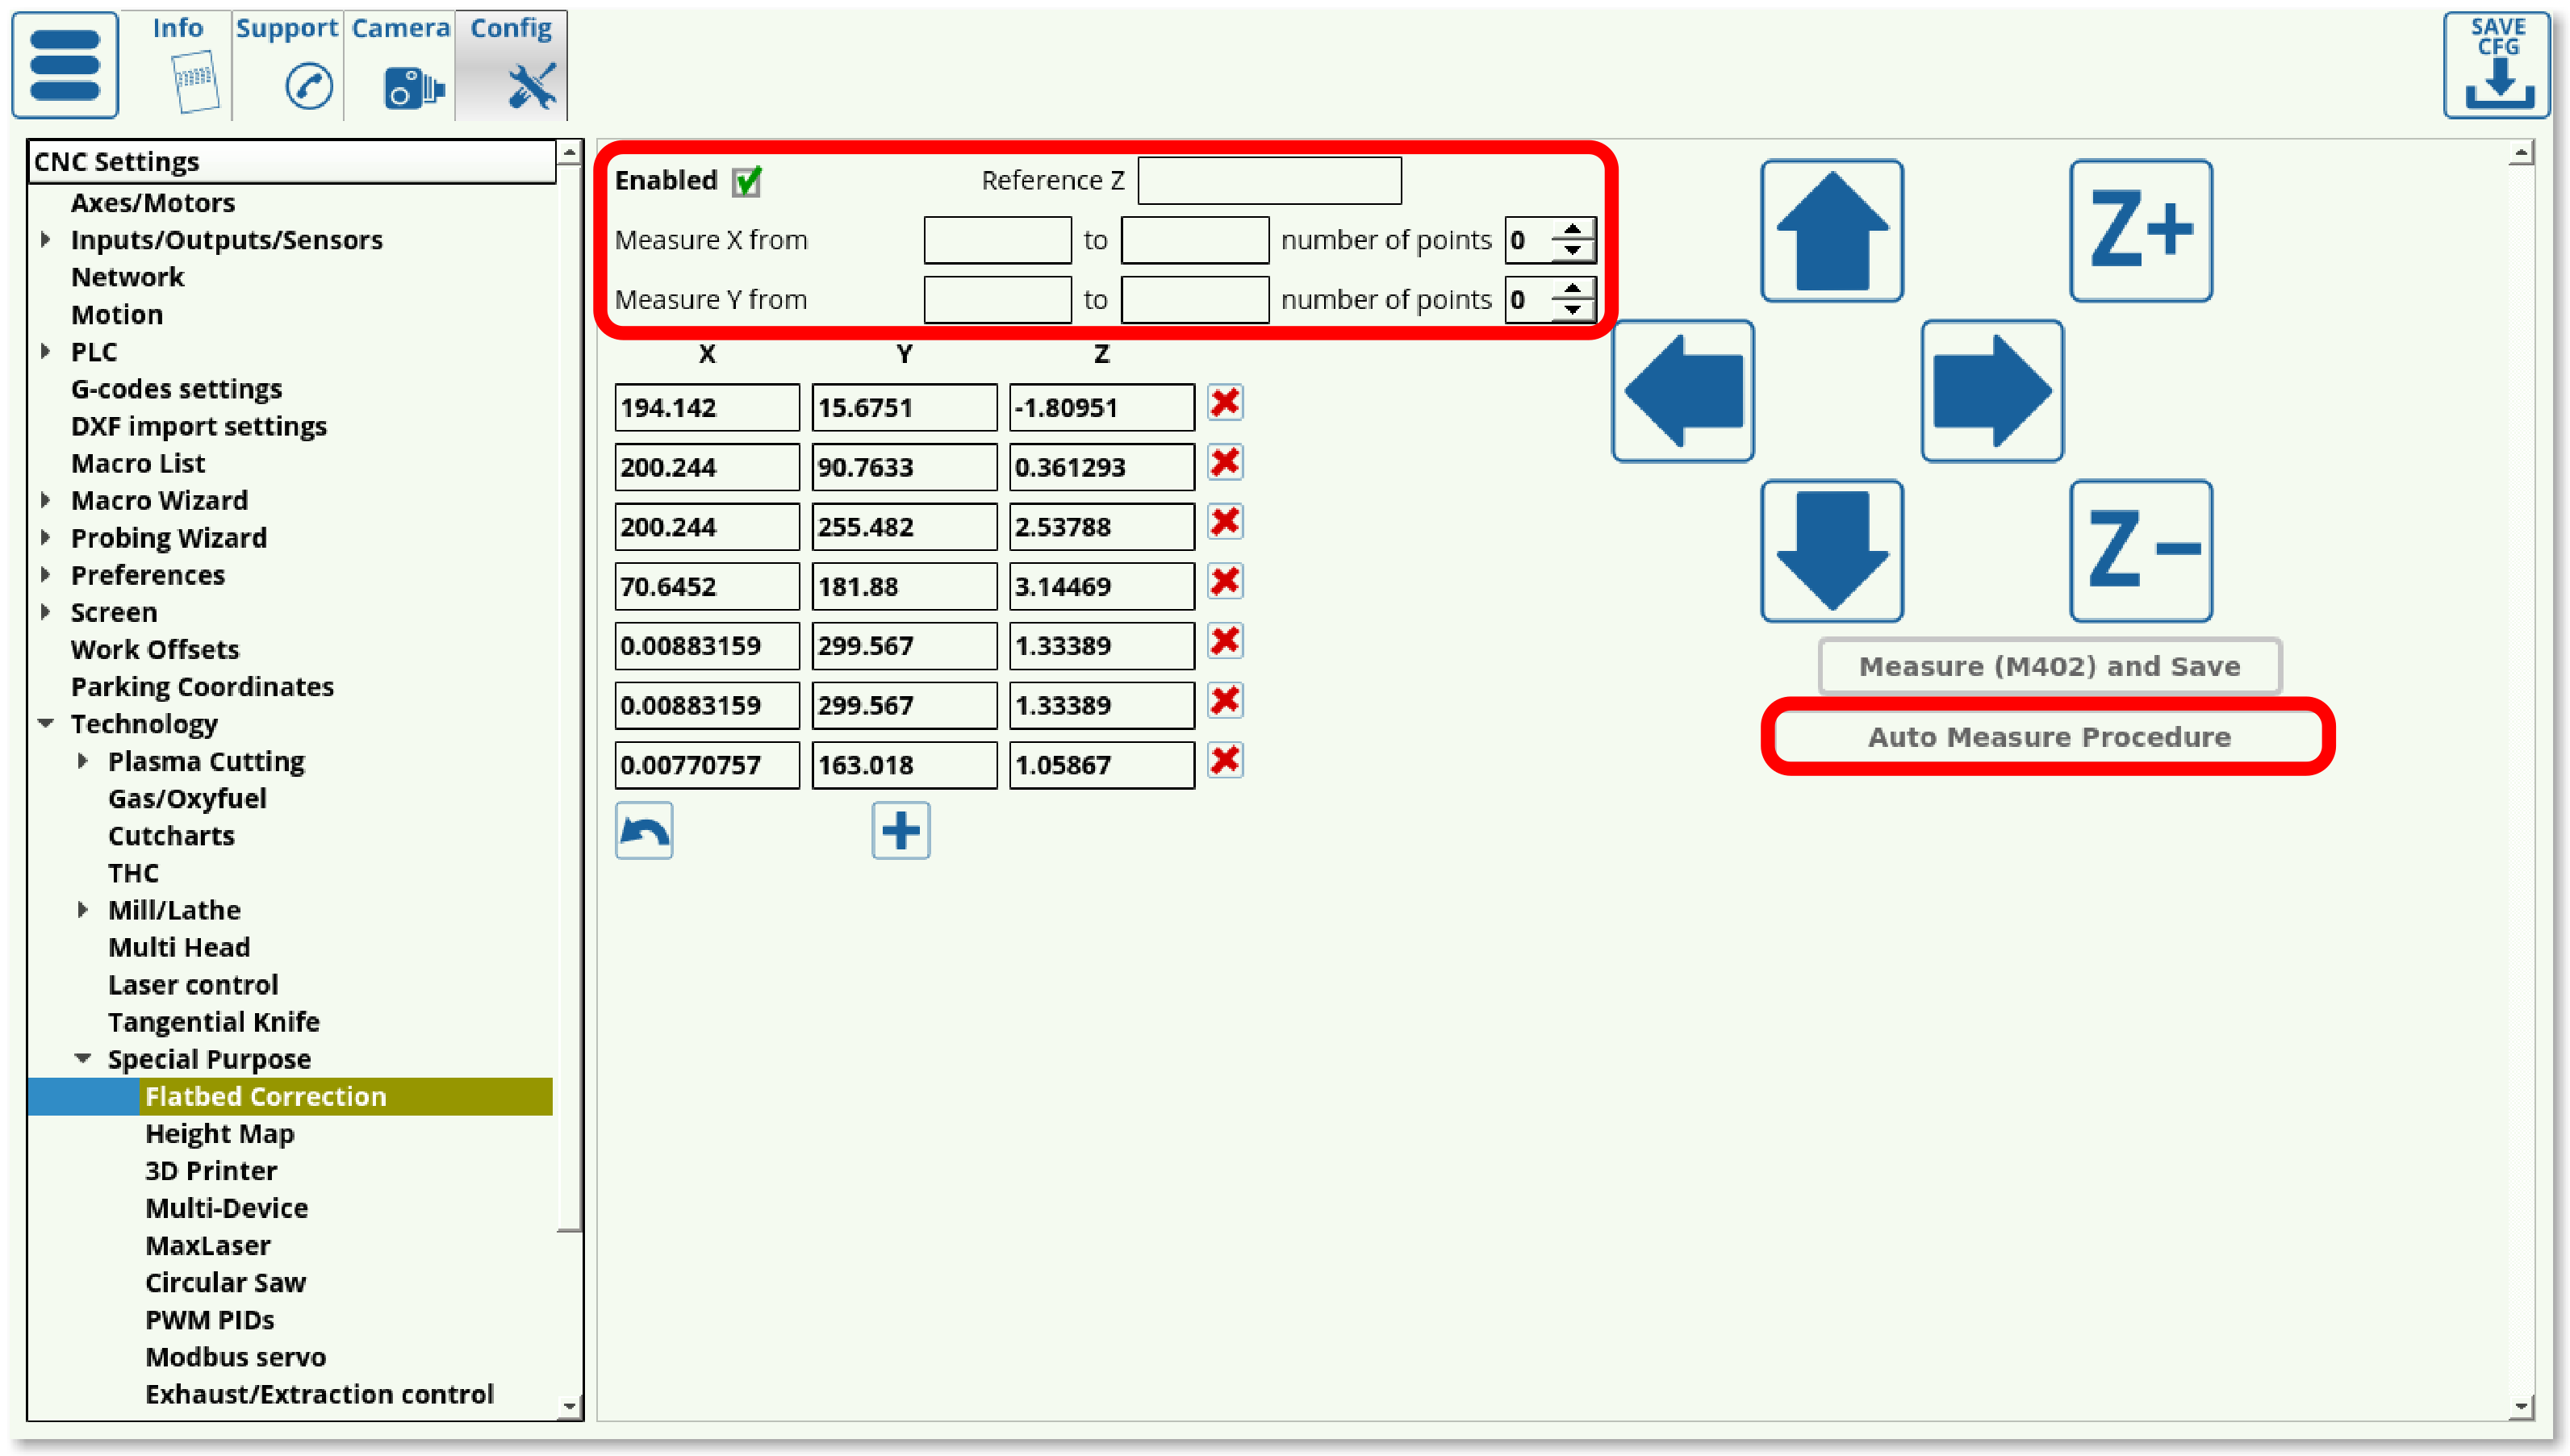
After the setup process has been completed, a table of points in the XY-plane and their Z-positions will be presented on this page. These values can either be recorded by using the AutoMeasure procedure, or by using a sensor and recording each point individually by using the M402 macro.
Using the AutoMeasure procedure, the operator can set the measurement distances for the X and Y axes as well as the number of points at which the height measurements will be taken for the XY-plane. The Auto Measure Procedure button can then be pressed to begin the probing process.
NOTE: If you leave the flatbed correction setting screen while the procedure is running, the measurement program will be paused until you return back to the screen.
After the measurement procedure has completed and all the points are logged, select the Reference Z value. The Reference Z value should be chosen to be between the minimum and the maximum measure point, preferably somewhere in the middle between the two.
NOTE: The myCNC flatbed correction feature is limited to 1000 pulses (+ or -) from the Reference Z position. Depending on the number of pulses per unit that you have set up in the Axes/Motors window, this may be anywhere from a centimeter to a fraction of a millimeter. If the machine moves above or below the 1000 pulses limit, it will not be able to accurately correct for flatbed distortion until it is back down below the limit. This is why the reference Z value must be selected correctly.
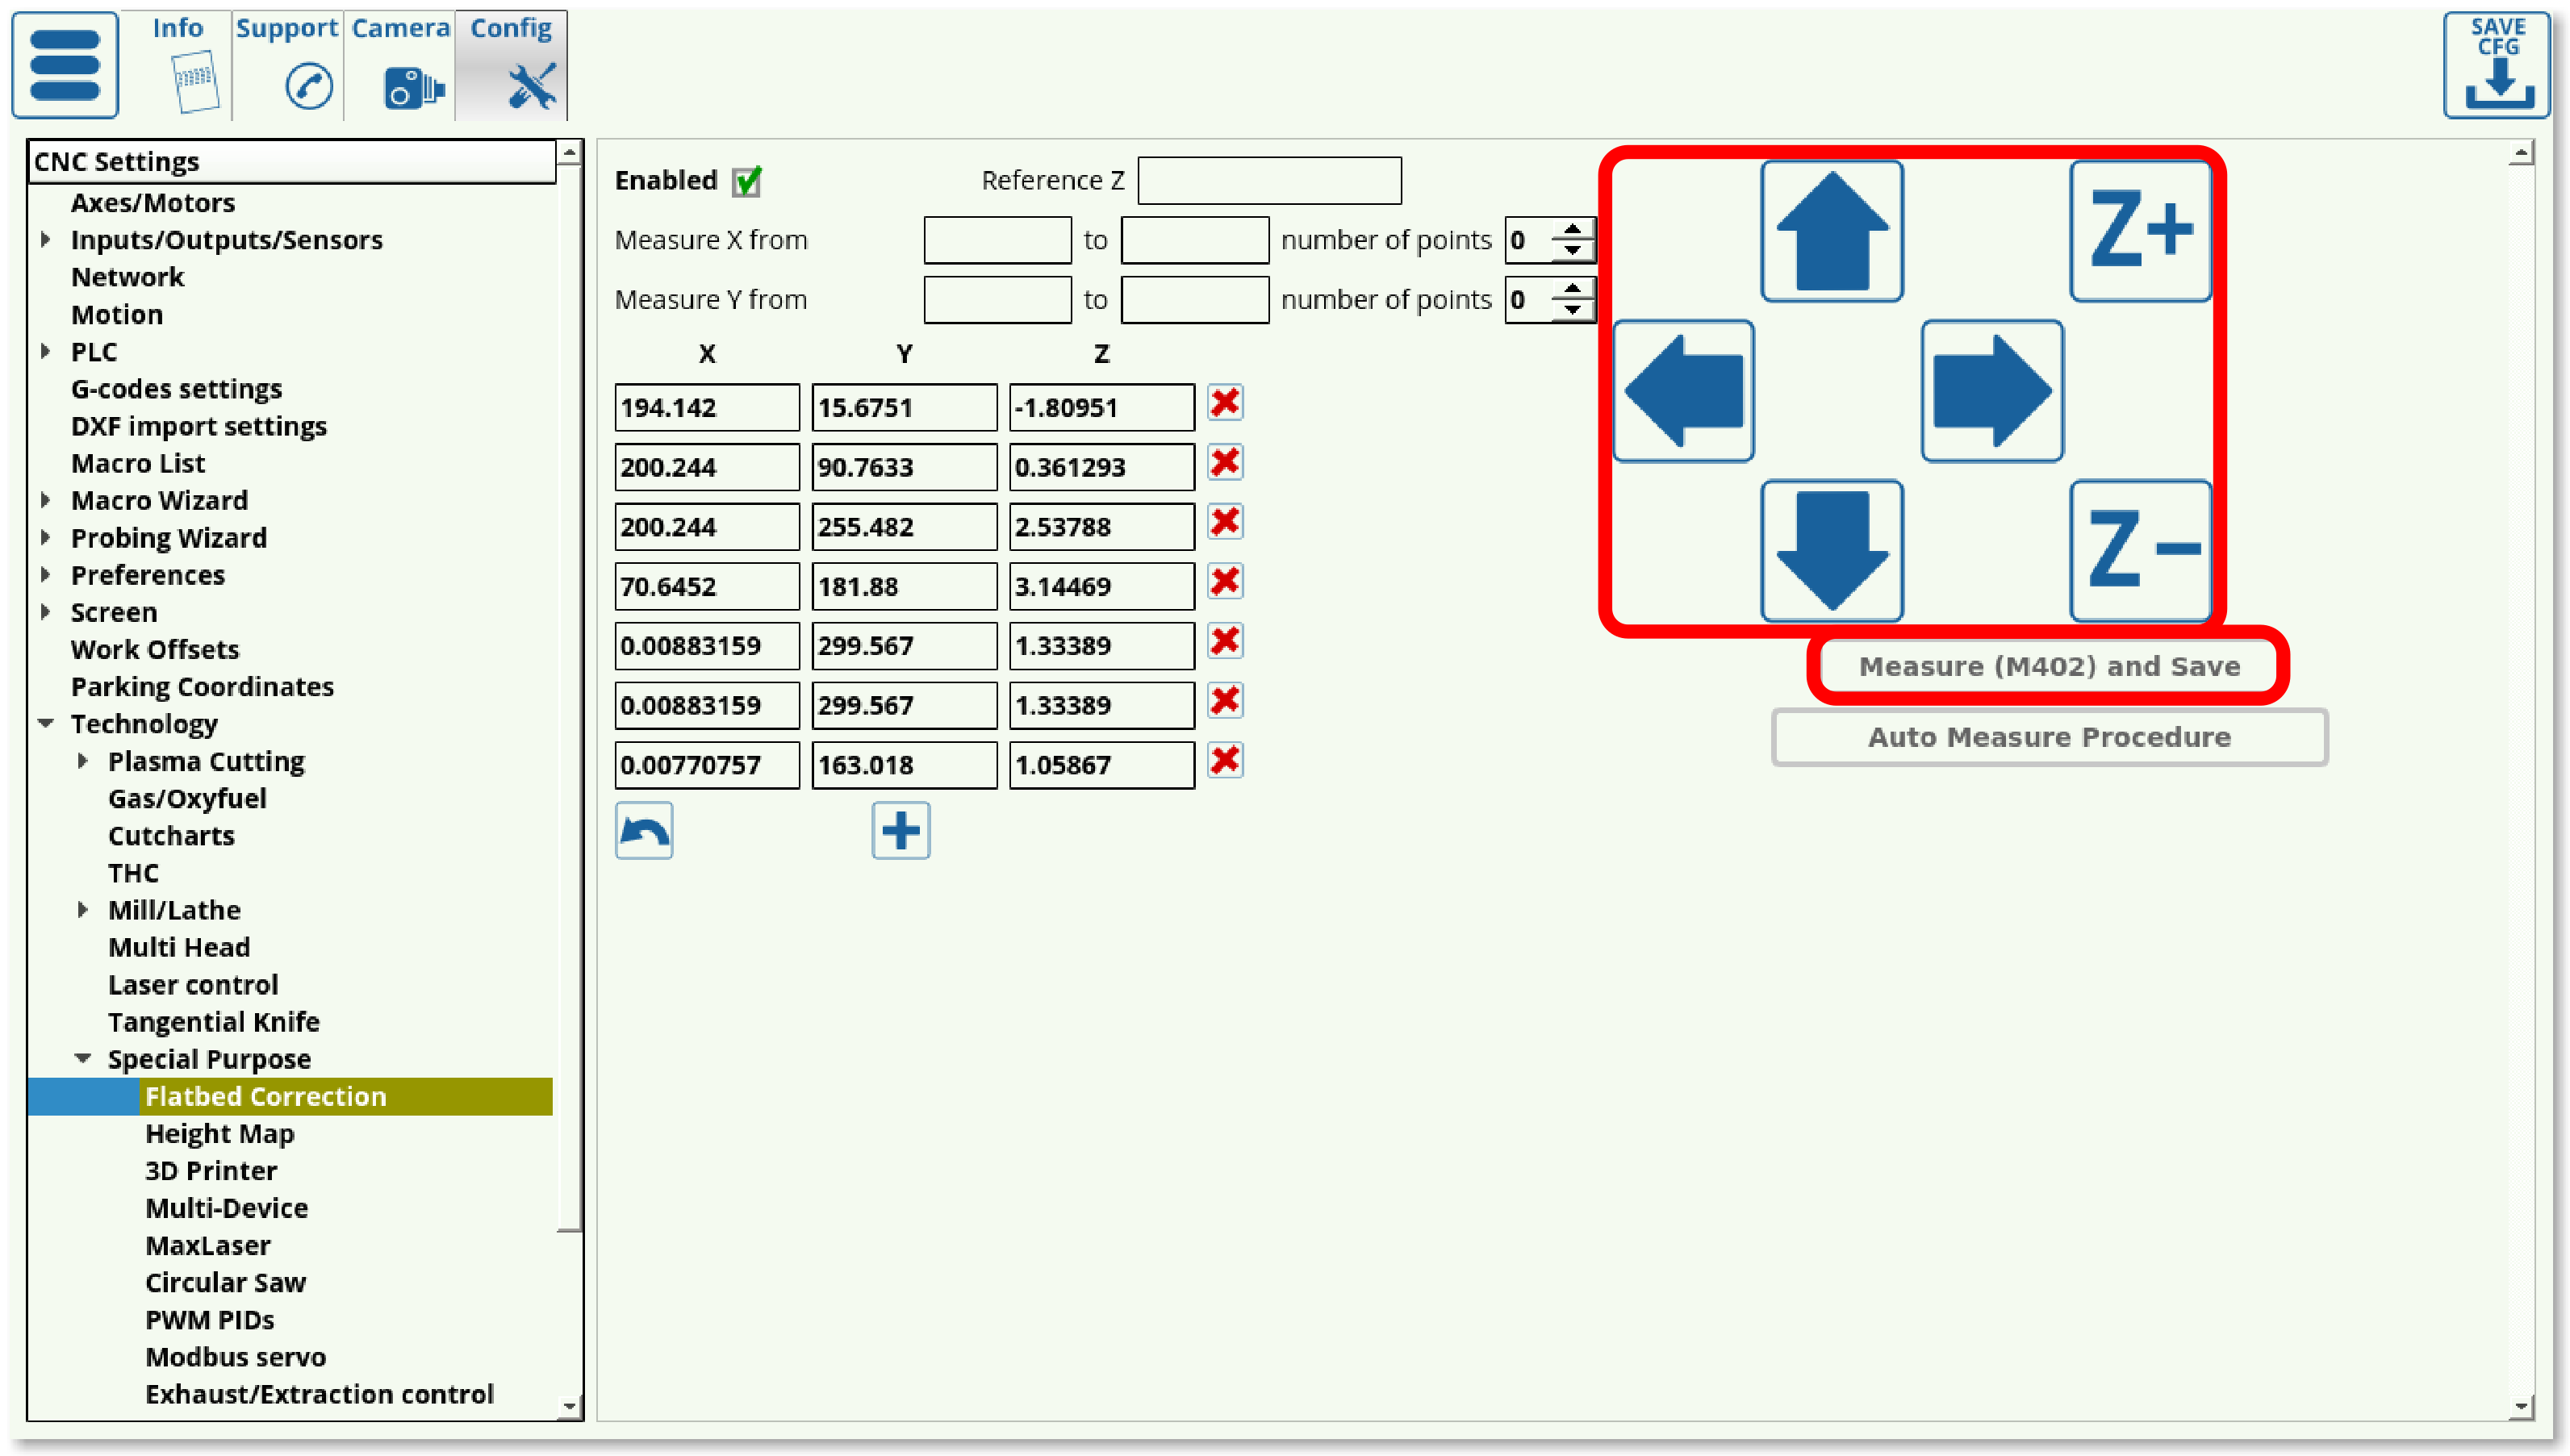
In order to use the M402 macro for manual point measurement, move the sensor to the position you want to measure, then press the Measure (M402) and Save button. This will lower the sensor down until contact, then lift it back up and record the z-position at which the sensor was triggered.
In order to remove any of the table level discrepancy values, you can press the Delete button for each particular value.
By adding these correction points, myCNC software will create an updated Z-axis map of the working table. From here on, whenever Flatbed Correction is enabled, the machine will automatically adjust the z-axis height of the working tool in order to adjust for the table level changes depending on where in the XY-plane it currently is.
M402 macro
The code for the M402 macro can be found below:
(Surface measure macro)
G28.2 Z0 (save current Z into Register1.Z)

M88 L1 P15 (watch for input(P) to be closed (L1) - EDIT THIS)
G91 G0 Z -35.000 F 200
(move down, stop if sensor triggered)
G91 G0 Z 2.000 F 400
M89 L1 P15 (watch for input(P) to be closed (L1) - EDIT THIS)
G91 G0 Z -2.000 F 20.0

G4 P0.2

G90 G10 L81 P8171 Q5021
G90 G10 L81 P8172 Q5022
G90 G10 L81 P8173 Q5023

G90 G10 L80 P8170 Q1

G91 G0 Z10
Here, you have to edit the two lines with the EDIT THIS comments. In the input P, you have to specify the input number for the sensor (set as 15 in this example), and in the L field you have to specify the behaviour that will be interpreted as the sensor being triggered (0 for a normally closed sensor which will be opened when triggered, and 1 for a normally open sensor which will be closed at contact).
